Sewing is something I enjoy doing but don't do very often. My kids are heading to camp in a few weeks, so that means the girls needed new culottes! They are super simple to make yourself! I was curious as to how much they cost online, and the cheapest I found were $18, for one pair. But, I was able to get the material and supplies for right around $20, and I will get a few pairs of culottes made.
I thought I would put myself out there and show you guys how I make my girls culottes!
*DISCLAIMER*
I am by no means a seamstress. I know how to sew basic things. With that being said, ignore my not perfectly straight lines, and my nontechnical lingo! :)
Step 1~Materials!
You will need, fabric, elastic, scissors, pins, sewing machine, and a pair of basket ball shorts. I use the shorts as a pattern, they work great!
Step 2~Cutting!
Lay the shorts out on your fabric. Leave some room on the side for extra wide legs.
I cut about 2 inches longer than the shorts, just to give more length for hemming.
Don't cut right up against the pattern. You will want the extra room!
Not the best picture, but then you take the piece you just cut out and cut out another one just like it!
You should now have four pieces cut out.
There are two panes shown, but there are actually four! When you cut them out your material was folded. I hope that makes sense! :)
Step 3~Sewing!
Now comes the fun part, sewing them together! You are going to sew along the inseam first, the curved part. :) Do this with both of your pieces.
I use a zigzag stitch.
Now you put the two pieces together. You need to put the right sides together.
Now you are going to pin the legs together. Sew these first!
All pinned and ready to be sewn!
After you have sewn the inside seam, you then sew the outside of the leg, do that on both sides.
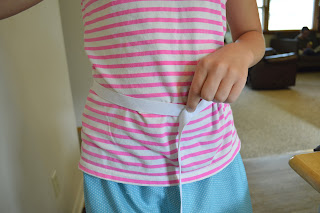
Now you measure for the elastic! You don't want it too tight, they won't be able to pull the culottes up if the elastic is too tight!:)
I then pin the waist band to be about an inch and a half. Enough room to run the elastic through.
Leave a space to thread you elastic through!
Pin one side of the elastic down, so you don't wind up pulling it all the way through.
Use a safety pin to thread the elastic through!
When you come out the other end, make sure that the elastic didn't get twisted as you threaded it through. Been there done that!
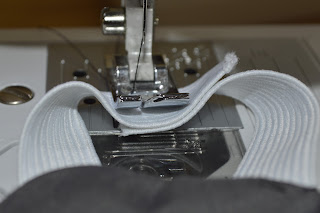
Overlap the two ends and sew them together! I sew them in a couple of lines so that the elastic doesn't come undone.
To keep the elastic from twisting, I like to sew it down. I find the side seam, and just sew the elastic down on each side!
Then you hem them to the desired length and you are good to go! Please ignore my raw edges. :)
And there you have them!
Eryn and cartwheel approved!
I sure hope this post helps someone! Most of all, I hope it made sense and is easy to follow along!


No comments:
Post a Comment